Great photography is needed when you have a product to sell and it becomes vital when you’re trying to persuade people to buy your products.
Image quality defines the product quality.
Poor quality image = Poor quality product
Research suggests that product photography is more important than product price, product reviews or product description. This is because people remember 80% of what they see and just 20% of what they read.
A clean, clear and a professional shot will make people take notice of the product. It engages their interest and they find out more about that product thus encouraging them to stay longer on the website. A poor quality image makes people think ‘poor quality product’ and they’re gone in a click.
So if you have great products to sell but your images are low quality, chances are you’re losing out on sales.
Bottom line is that the better your products look, the more products you’ll sell.
Below is a list of our 7 top tips of things to consider when creating your professional product photography.
1. Create a Shot List
List does the number of products you want to photograph along with the number of images of the same product you want to showcase. Potential customers want to have a really good look at the product so consider taking shots from different angles. You should include close ups, detail shots as well as wide angle shots. You should include a group shot if you want to create a collection. A group shot is often missed out when the list is compiled. It’s a good hero shot which is great for banner ads on social media.
A strong shot list will also keep you on track during the shoot and you’re less likely to miss anything out. It’ll help you work more efficiently.
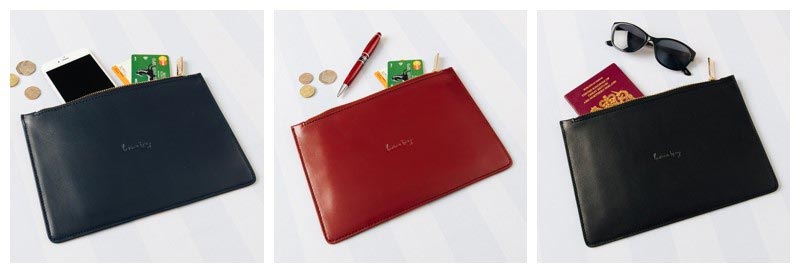
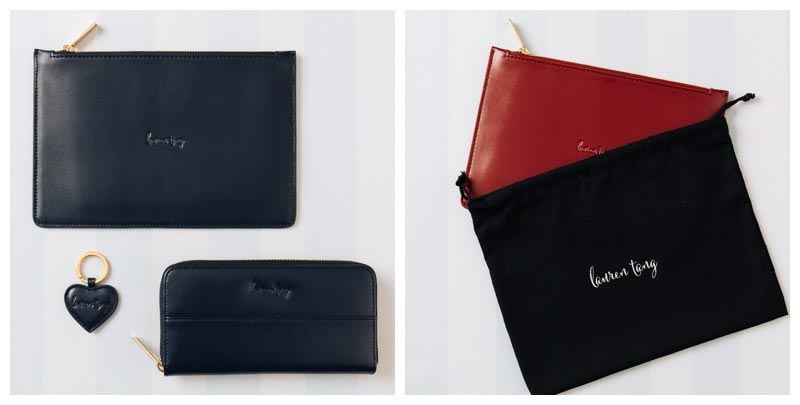
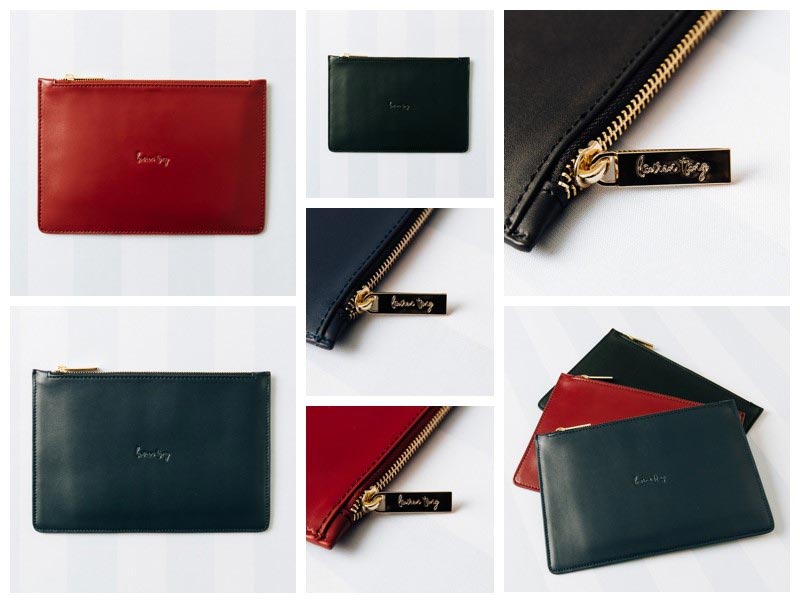
2. Show All Product Colours and Styles
If your product comes in different colours and styles, you need to show these. Since customers can’t see or touch your products, your photographs need to illustrate their quality, style and colours.
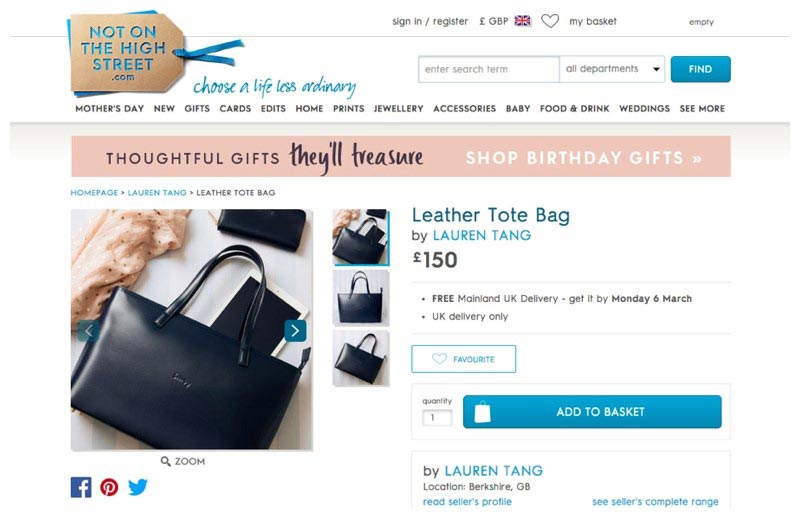
Below is an example of the work we did for Lauren Tang for her “Not On The High Street store”. The Lauren Tang Clutch comes in three colours. We were sure to showcase each colour, accessorising each in a slightly different way yet still maintaining consistency.
3. Make Your Products Look The Best
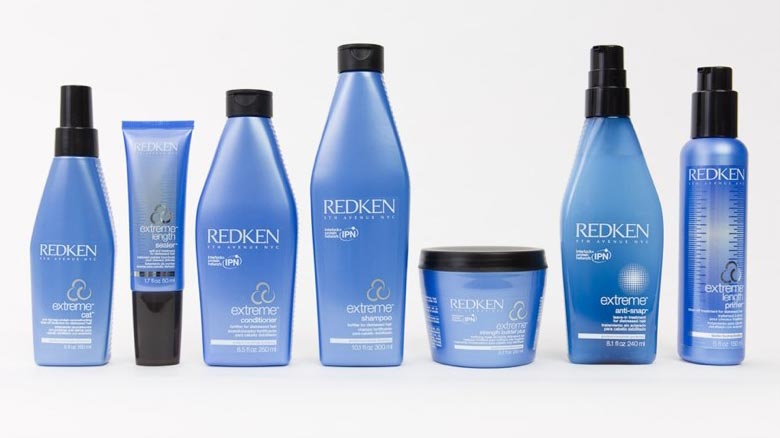
You want your products to look good but let’s get to the details. Make sure the lighting is spot on as dark shadows look terrible. There are some products that need to be shot in a clean, clear way with no props and no accessories. Just the product on it’s own. It’s these shots that require spot on lighting. In fact, it is these simple shots that are often the trickiest to photograph.
Good framing is important too and if you have a range you may consider framing each product in the same way to maintain consistency.
4. Think About Size and Scale
Many people include props rather cleverly to show the size and scale of their products. It could just be including a set of keys, a lipstick or the product in use to show the size.
If you do want to add in props, put some thought into what needs to go into the shoot. The props need to compliment the product and not take over. You want your product to be the hero so be careful to not over accessorise.
Another simple option is to actually show your products in use. This is a great way to introduce a lifestyle element to your product photography.
5. File Size In Photography
File size is very important. You may think that people will only look at your website on their smartphone so the quality of the image doesn’t need to be that good but people use larger monitors to view products also. If they use a high resolution monitor, the image is sure to be blurred and low quality. Hence you need to plan for all devices that your target customers use. Even if you engage a professional photographer, check what file size you need. A quick chat with your website developer or your print designer will answer this question.
“Not On The High Street” are very specific about file size. They need images that are square, 72 dpi and a minimum of 4096 x 4096 pixels. So if you’re using a professional photographer, make sure you have that discussion with them before the shoot!
6. Orientation – Square, Landscape or Portrait?
Consider how you would want to present your images after the shoot. Will you be using them on Instagram in the square format or perhaps you will need them in landscape mode for your banner ads online or maybe portrait is more suited to your web design. Have a think about this before you start to shoot. Yes, you can crop in post-production, but the crop will reduce the file size so be careful.
7. Consider Using a Professional Photographer!
Presenting your products in a professional way will make you stand head and shoulders above the rest.
If your photographs are great they will also increase your chances of them getting picked up by the press – magazines, supplements and newspapers will want to use professional, high quality images.
If you’d like to discuss your product photography with us, please do get in touch. We’d love to help you.
(All images Jon Bradley Photography).
Recent Comments